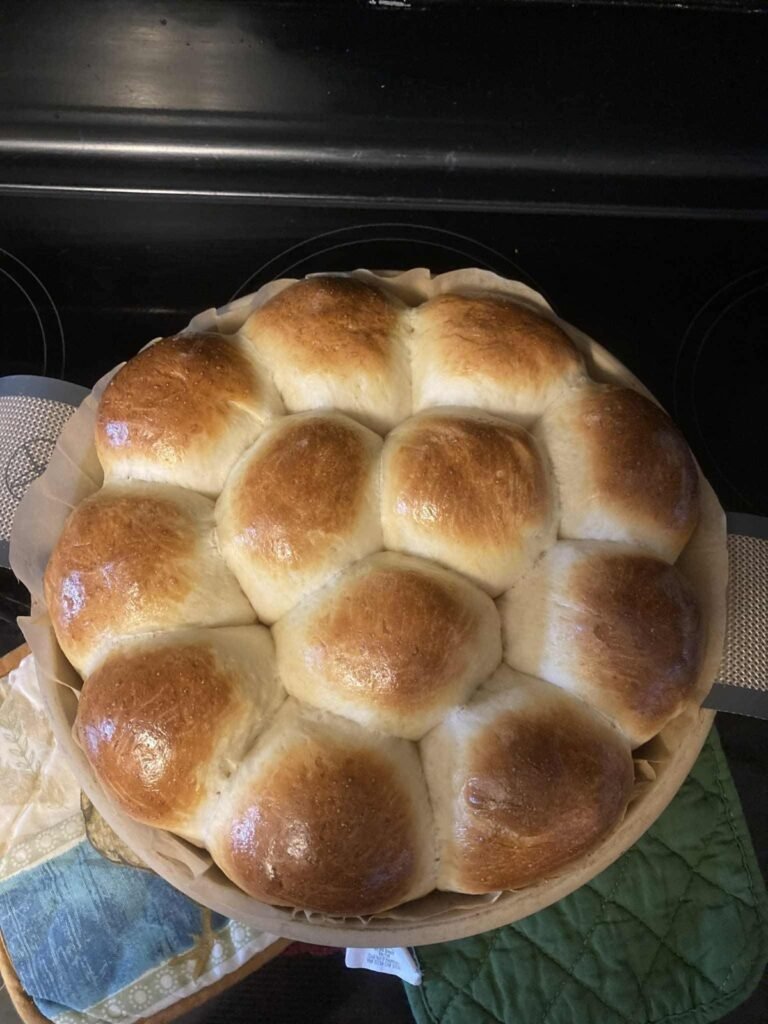

These Soft Homemade Dinner Rolls are fluffy, golden, buttery, and perfect for serving alongside almost any meal. The rolls shown in the picture have beautifully browned tops, a soft center, and a pull-apart texture that makes them especially inviting.
Made with simple pantry ingredients, these homemade rolls are surprisingly easy to prepare. The dough is soft and slightly enriched, then divided into individual portions and arranged closely together in a round baking dish. As they rise and bake, the rolls expand and touch one another, creating that gorgeous pull-apart appearance.
Whether you’re preparing a holiday dinner, Sunday roast, family meal, or simply want fresh bread at home, this recipe is one you’ll want to make again and again.
Why You’ll Love These Dinner Rolls
- Soft and fluffy inside
- Beautiful golden-brown tops
- Lightly buttery flavor
- Easy homemade dough
- Perfect pull-apart texture
- Great for holidays and family dinners
- Delicious with butter or gravy
- Can be prepared ahead of time
Ingredients
For the Dough
- 4 cups all-purpose flour
- 2 ¼ teaspoons active dry yeast
- ¼ cup granulated sugar
- 1 teaspoon salt
- 1 cup warm milk
- ¼ cup warm water
- 1 large egg
- 4 tablespoons unsalted butter, melted
- 1 tablespoon honey, optional
For the Topping
- 2 tablespoons melted butter
- 1 tablespoon milk or cream, optional
- Sesame seeds or poppy seeds, optional
How to Make Soft Homemade Dinner Rolls
Step 1: Activate the Yeast
Begin by adding the warm milk and warm water to a large mixing bowl.
The liquid should feel warm but not hot. Very hot liquid can damage the yeast.
Add the sugar and active dry yeast.
Stir gently and let the mixture sit for approximately 5–10 minutes.
The surface should become slightly foamy. This is a good indication that the yeast is active.
If your yeast does not foam at all, check the expiration date and make sure the liquid wasn’t too hot or too cold.
Step 2: Add the Wet Ingredients
Once the yeast mixture is ready, add the egg, melted butter, and honey if using.
Whisk gently until everything is combined.
The melted butter adds richness while the honey provides a subtle sweetness and helps create beautifully golden rolls.
Step 3: Add the Flour
Add approximately 3 cups of flour along with the salt.
Mix with a wooden spoon or dough hook until the mixture starts forming a dough.
Gradually add the remaining flour, about ¼ cup at a time.
You may not need every last bit of flour, depending on the humidity and the size of your measuring cups.
The dough should be soft and slightly tacky but shouldn’t be extremely sticky.
Avoid adding too much flour because a very stiff dough can result in heavy, dense rolls.
Step 4: Knead the Dough
Transfer the dough onto a lightly floured surface.
Knead for approximately 8–10 minutes by hand.
If using a stand mixer with a dough hook, knead on low to medium speed for about 5–7 minutes.
The finished dough should become smooth, elastic, and soft.
To test it, gently press a finger into the dough. It should slowly spring back.
Step 5: First Rise
Place the dough into a lightly greased bowl.
Turn it once so the surface is lightly coated with oil or butter.
Cover the bowl with a clean kitchen towel or plastic wrap.
Place it somewhere warm and allow the dough to rise for approximately 1–1½ hours, or until it has doubled in size.
The rising time will depend on the temperature of your kitchen.
Step 6: Shape the Rolls
Once the dough has doubled, gently punch it down to release excess air.
Transfer it to a lightly floured surface.
Divide the dough into approximately 14–16 equal pieces.
For perfectly even rolls, you can use a kitchen scale to divide the dough.
Take each piece and gently pull the edges underneath, creating a smooth, round ball.
Place the dough balls into a greased round baking dish or cake pan.
Arrange them close together but leave a little room between them for the second rise.
As they rise, the rolls will expand and eventually touch, creating the beautiful pull-apart shape seen in the picture.
Step 7: Second Rise
Cover the shaped rolls loosely with a clean kitchen towel.
Allow them to rise again for approximately 30–45 minutes.
They should become noticeably puffy.
Don’t skip this second rise. It helps create the light and airy texture that makes homemade dinner rolls so delicious.
Step 8: Prepare the Oven
While the rolls are completing their second rise, preheat your oven to 375°F (190°C).
Make sure the oven is fully heated before placing the rolls inside.
Step 9: Add the Butter
Just before baking, brush the tops of the rolls lightly with melted butter.
You can also brush them with a little milk or cream for an especially beautiful golden finish.
If you enjoy a decorative topping, sprinkle a few sesame or poppy seeds over the rolls.
Step 10: Bake
Place the rolls in the preheated oven.
Bake for approximately 20–25 minutes, or until the tops are beautifully golden brown.
The rolls should feel light and sound slightly hollow when gently tapped.
Keep an eye on them during the final few minutes because oven temperatures can vary.
If the tops are browning too quickly, loosely cover the rolls with aluminum foil and continue baking.
Step 11: Brush With Butter
Remove the rolls from the oven.
Immediately brush the hot tops with melted butter.
This gives them a beautiful shine and adds extra buttery flavor.
Allow the rolls to cool for approximately 10 minutes before serving.
They are especially delicious while still warm.
Tips for Perfect Homemade Rolls
Use fresh yeast: Fresh, active yeast is essential for properly risen rolls.
Don’t use hot milk: Warm is enough. Extremely hot liquid can kill the yeast.
Don’t add too much flour: The dough should remain soft and slightly tacky.
Knead properly: Kneading develops gluten and gives the rolls their stretchy, fluffy texture.
Give the dough enough time to rise: Rushing the rising process can result in dense rolls.
Keep the dough warm: A warm, draft-free location helps yeast dough rise efficiently.
Don’t skip the second rise: This is one of the secrets to light and fluffy dinner rolls.
Brush with butter: Adding melted butter immediately after baking keeps the crust soft and flavorful.
Garlic Butter Dinner Rolls
For a delicious savory variation, turn these into garlic butter rolls.
Combine:
- 3 tablespoons melted butter
- 1 minced garlic clove
- 1 tablespoon chopped fresh parsley
- Pinch of salt
Brush the mixture over the warm rolls immediately after they come out of the oven.
The garlic butter soaks into the warm bread and creates an incredibly flavorful side dish.
Honey Butter Rolls
For a sweeter version, combine softened butter with a little honey.
Spread the honey butter over warm rolls just before serving.
These are especially delicious for breakfast or alongside a holiday meal.
Cheesy Dinner Rolls
Add shredded cheddar, mozzarella, or Parmesan cheese to the dough before shaping.
You can also sprinkle cheese over the rolls during the final few minutes of baking.
The melted cheese creates a delicious savory topping.
Herb Dinner Rolls
Add 1–2 teaspoons of dried herbs such as:
- Rosemary
- Thyme
- Oregano
- Italian seasoning
Fresh herbs can also be added for an even more aromatic flavor.
Make-Ahead Dinner Rolls
These rolls are excellent for preparing ahead of time.
You can make the dough and shape the rolls earlier in the day.
After shaping, cover the pan tightly and refrigerate until you’re ready to bake.
Allow the rolls to sit at room temperature for a while before baking so they can become puffy again.
This makes the recipe particularly convenient for Thanksgiving, Christmas, Easter, and other large family meals.
What to Serve With Dinner Rolls
These soft rolls are incredibly versatile.
Serve them with:
- Roast chicken
- Roast turkey
- Mashed potatoes
- Beef stew
- Chicken soup
- Vegetable soup
- Gravy
- Pot roast
- Pasta
- Baked chicken
- Holiday dinners
They’re also fantastic for making small sandwiches or sliders.
Split a warm roll and fill it with sliced turkey, ham, chicken, cheese, or leftover roast meat for an easy lunch.
How to Store Homemade Rolls
Allow the rolls to cool completely before storing.
Place them in an airtight container or tightly sealed food bag.
They can generally be kept at room temperature for a short period.
For longer storage, freeze the baked rolls.
Wrap them tightly and place them in a freezer-safe bag or container.
When ready to serve, thaw them and warm them gently in the oven.
Brush with a little melted butter after reheating to restore their soft texture and buttery flavor.
Frequently Asked Questions
Why are my dinner rolls dense?
Dense rolls are often caused by inactive yeast, too much flour, insufficient kneading, or not allowing the dough enough time to rise.
Can I use instant yeast?
Yes. Instant yeast can be mixed directly with the dry ingredients, although you can also dissolve it in the warm liquid if you prefer.
Can I make smaller rolls?
Absolutely. Divide the dough into 18–20 pieces for smaller dinner rolls and reduce the baking time slightly.
Can I make larger rolls?
Yes. Divide the dough into fewer portions for larger sandwich-style rolls. They may require a few extra minutes of baking.
Final Thoughts
These Soft Homemade Dinner Rolls are a wonderful addition to any meal. They’re fluffy, buttery, lightly sweet, and beautifully golden on the outside while remaining soft and tender inside.
The pull-apart arrangement makes them especially attractive when served directly in the baking dish. Simply place the warm pan on the dinner table, add some softened butter, and let everyone pull off a roll.
Once you get comfortable making this simple yeast dough, you’ll find countless ways to customize it with garlic, herbs, cheese, honey, or your favorite seasonings.
Fresh from the oven and brushed with melted butter, these homemade rolls are the kind of comforting side dish that can turn an ordinary family dinner into something truly special.